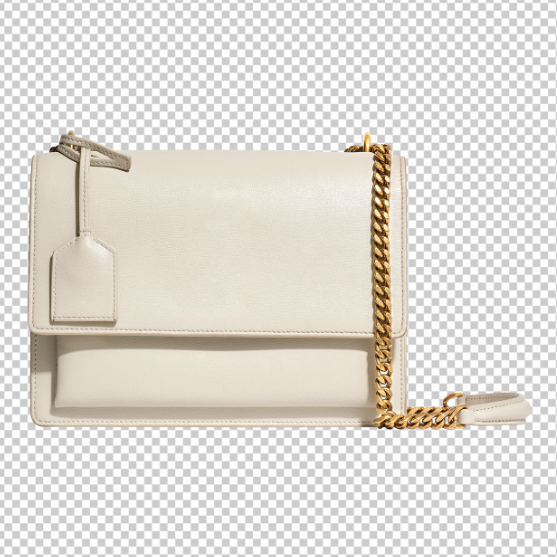
Background Removal for Product Photography: A Step-by-Step Guide
Enhance Your Product Images for Maximum Impact
In the competitive world of eCommerce, high-quality product images make or break a sale. Clean, professional images attract customers, build trust, and increase conversions. One of the most effective techniques to enhance product visuals is background removal.
Removing backgrounds allows you to eliminate distractions, create consistent branding, and make your products stand out across websites, social media, and marketing materials. In this comprehensive guide, we’ll walk you through the step-by-step process of background removal—covering both manual and automated methods—so you can master this essential skill and boost your eCommerce success.
Why Background Removal is Essential for eCommerce
Before diving into techniques, let’s understand why background removal matters in product photography:
✔️ Eliminates distractions – A clean background keeps the focus on your product, improving customer engagement.
✔️ Creates consistency – Uniform backgrounds build brand identity, making your store look professional.
✔️ Increases sales – High-quality product images boost conversions by improving perceived value.
✔️ Optimizes images for multiple platforms – Transparent or solid-colored backgrounds make it easier to adapt images for ads, websites, and social media.
Choosing the Right Equipment and Camera Settings
The quality of your original images impacts how easily you can remove backgrounds. To streamline the editing process, start with a well-executed product photoshoot.
Essential Equipment:
📸 High-resolution camera – Ensures sharp details for clean extractions.
💡 Soft, even lighting – Reduces harsh shadows and helps separate the subject from the background.
🎯 Tripod – Keeps the camera stable, ensuring consistency across images.
Best Camera Settings:
-
Aperture: f/8 – f/11 for deep focus.
-
ISO: 100–400 for minimal noise.
-
Shutter Speed: 1/125s or faster to prevent motion blur. Best Practices for Capturing Images with Background Removal in Mind
To make background removal faster and more precise, follow these pro tips when shooting:
✅ Use a solid-colored backdrop – White, gray, or green screens work best for easy removal.
✅ Ensure even lighting – Avoid harsh shadows that complicate extraction.
✅ Use a tripod – Keeps images consistent, making edits seamless.
Preparing Your Images for Background Removal
Before jumping into editing, organize and optimize your images:
📂 Organize Files – Use folders to categorize images by product or project.
✔️ Select the Best Shots – Choose well-focused, properly lit images for easier edits.
🛠 Basic Adjustments – Use editing software to fine-tune exposure, contrast, and sharpness before background removal.
Manual Background Removal Techniques
For maximum control, use manual tools in photo editing software:
🖱 Magic Wand Tool – Best for simple backgrounds with high contrast.
✏️ Pen Tool – Ideal for intricate objects, allowing precise cutouts.
🧽 Eraser Tool – Used to fine-tune edges after initial removal.
Best Software for Manual Background Removal:
✅ Adobe Photoshop – Industry-standard tool with precise selection options.
✅ GIMP – Free alternative with similar capabilities.
Automated Background Removal Tools
For faster results, AI-powered tools offer one-click background removal:
🤖 Remove.bg – AI-based tool that automatically removes backgrounds in seconds.
🖌 Adobe Photoshop’s Background Eraser – Uses color contrast detection to delete backgrounds.
🌟 Canva Pro & Luminar AI – Easy-to-use AI-powered background removal tools.
When to Use Automated Tools:
⚡ Batch Editing – Quickly process large volumes of images.
🚀 Speed Over Precision – Works well for simple objects with clean edges.
Refining Edges for a Polished Look
After removing the background, refine edges to ensure a natural, professional appearance:
✔️ Feather Edges – Smoothens jagged lines for a natural transition.
✔️ Adjust Transparency – Avoids visible cutout lines.
✔️ Use Layer Masks – Allows non-destructive edits, making adjustments easier.
Saving & Exporting Your Images
Once background removal is complete, export images in the best formats for different uses:
🖼 PNG (Transparent Background) – Best for eCommerce listings, ads, and layered designs.
📄 JPEG (Solid Background) – Optimized for web use with smaller file sizes.
📂 TIFF (High-Quality Retouching) – Retains detail for print and professional use.
Troubleshooting Common Challenges
Even with the best techniques, some objects require extra attention:
🔹 Handling Transparent Objects – Adjust contrast and use layer masks for a clean cutout.
🔹 Dealing with Hair or Fine Edges – Use Refine Edge Brush Tool in Photoshop.
🔹 Fixing Color Spill – Adjust hue/saturation to remove unwanted color reflections.
Conclusion: Elevate Your eCommerce Visuals with Background Removal
Mastering background removal is a game-changer for eCommerce photography. With clean, distraction-free images, you can:
✅ Boost sales with high-quality visuals.
✅ Create a professional, consistent brand identity.
✅ Optimize images for multiple platforms with ease.
🚀 Start practicing today and transform your product images into powerful sales assets!
